Everybody is doing content. You know you need to do it too. You start, but soon enough you find yourself bogged down in planning, managing, and scheduling. Things quickly descend into chaos.
Publishing useful and engaging content is a top priority for marketers from all fields today. But nobody said doing it is easy. Even if you have an amazing content strategy, executing it can be a mess of tasks, deadlines and all sorts of little details that are so easy to forget. On top of that, creating and distributing content is rarely a one-man show. Usually, a few team members are involved, which means smooth coordination and communication are musts.
You’d probably agree that handling the whole content marketing process can be a big bite.
But there’s a simple method that can significantly ease the process.
Running a content calendar can give you a much-needed bird’s-eye view of your content marketing efforts. It’s a one-stop shop for keeping all content ideas, handling your knowledge base such as strategy and process documents and organizing your team’s work on content, so that everybody is on the same page.
Managing a #contentmarketing strategy is tough. Learn how to take back control with a content calendar Click To TweetBesides, your editorial calendar is a trusted partner in crime in meeting deadlines, organizing content around key dates, and filling content gaps when needed.
Here’s how we make use of our editorial calendar at Hubstaff to drive our content strategy further. I’ll take you through each step on the way to creating a functioning calendar, from the right tools to the exact process you can follow to skyrocket your content efforts.
Boost your team’s efficiency with Hubstaff's productivity tools
Try it free for 14 daysThe tools you need to run an editorial calendar
Setting up an editorial calendar doesn’t need to be complicated. But you need to be clear from the start what help you need in terms of features so that your calendar is well-integrated in your workflow.
So before we get into the actual tools, let’s review what functionalities you need to have at hand.
What functionalities do you need?
As with any team activity that needs organizing, you need a project management system in place. At Hubstaff, we are fans of the Kanban method because it effectively helps us to turn chaos into a controlled creative space. There are other tools that you can make work with your calendar (such as the Waterfall method for example). It’s up to your team’s preferences how you decide to go about this.
Naturally, you also need to have a calendar functionality, so that you can arrange your editorial process on a timeline.
Communication features are another must, as it is essential for team members to be able to exchange information about the tasks at hand. Slack is often a preferred alternative. Whatever you choose, you have to make sure your communication platform integrates with the rest of your tools (such as Trello, for example).
It’s best if your file repository platform is embedded or can easily integrate with your calendar too. For instance, if it’s integrated with DropBox or Google Drive, you can easily link to content files right from the calendar.
Finally, don’t forget about time tracking. This is the only way to measure the ROI of your content efforts, so it’s adamant to have it in place. The best case scenario is to have it integrated into your calendar. Our very own Hubstaff integrates with most work tools out there, so it’s a great option. Our upcoming project management tool, in fact, will provide time tracking straight inside the platform, which is another smart way to keep track of your work.
What are the top tools to use?
Once you’ve outlined your needs in terms of software functionalities, you can look further and choose the actual tools you will use.
At Hubstaff, we use Trello to manage our content calendar Click To TweetWe have to admit that’s our favorite option at this time (although we’re building our own solution Projects), as it gives us all the features we deem necessary at this point.
Of course, there are numerous alternatives that you can explore too. CoSchedule is a specialized editorial calendar tool (paid), which is tailored to running a blog. I haven’t used it personally, but I’ve heard it’s one of the best solutions on the market.
Additionally, you can use one of the following plugins to complement or run your calendar from the WordPress back-end:
Last but not least, spreadsheets are commonly used to keep track of editorial content. Popular choices include Google Spreadsheets and Microsoft Office Excel, but you can use any tool you like. Templates are available online, which can guide you how to use spreadsheets. I’d say there are not the optimal choice, but in some cases, they can be very useful for content teams.
Subscribe to the Hubstaff blog for more tips
Here’s how you can use Trello for managing your editorial calendar
If your heart is set on Trello, you can use it to manage your whole content production process. Let me show you what our Editorial Calendar Board looks like: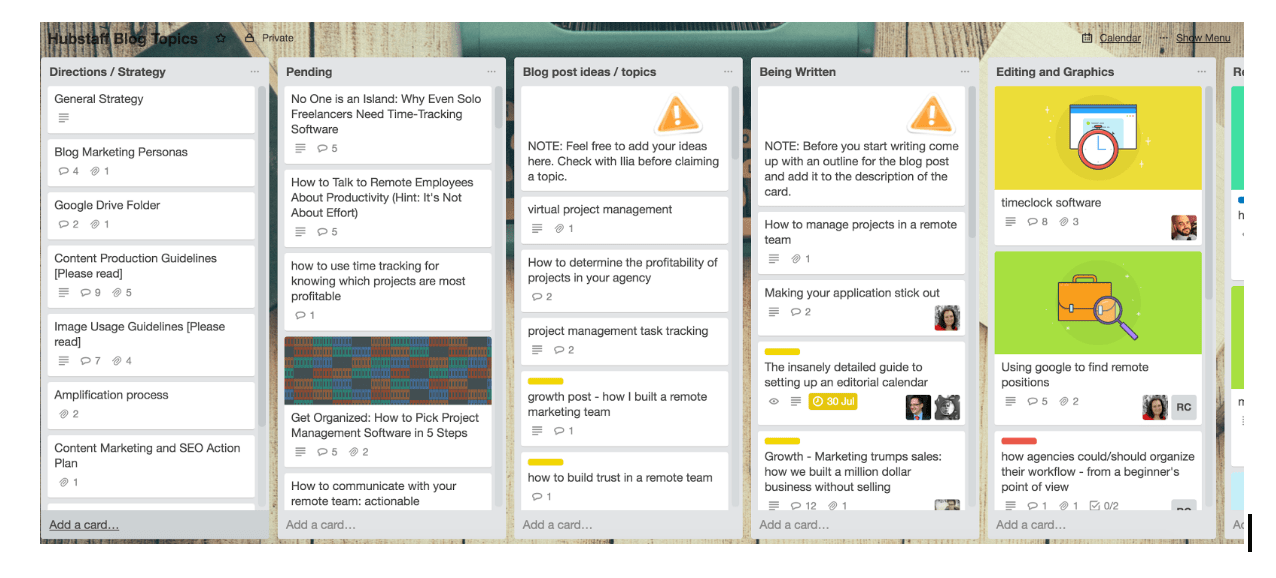 As you can immediately see, everything related to content creation is right there on the board.
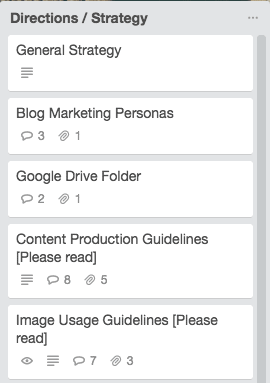
In the first column list Directions / Strategy, we keep our complete knowledge base dedicated to content creation and distribution. All important documents such as content creation directions and content strategy are linked here for quick reference and easy access by all team members.
The next list called Pending contains all ideas or written posts that are on pause currently, but which we want to use in the future.
Blog post ideas is the place where the whole team can brainstorm and add topics to work on. We keep our process open for all team members to participate with content topic ideas. Before people pick a topic from this list, I ask them to run it through me to make sure it matches our strategy and timetable.
The Being written list keeps track of the articles that are currently being created. Before writers start working on a piece, we agree on an outline together, so that we optimize the writing process afterwards.
Once a post is written and added to WordPress, its card goes to the Editing and graphics list. Our blog content designer starts working on a header image and any additional visuals, such as for content upgrades and others.
The next list, Ready for review, is my list. Once a card reaches it, it’s my responsibility to get that post 100% ready to be shared with the world.
When I’m done with preparations, the posts move to the Scheduled list. It’s only me who handles this list to avoid miscommunication and chaos.
Finally, after the articles get published, I move them to the Published and Ready for Distribution list. When a card reaches this list, the blog post is live and gets handed off to Madhav to get amplified.
Our Trello Editorial Calendar productivity hacks
There are a few simple rules to using Trello that we follow at Hubstaff that boost our editorial calendar efforts. Here they are:
#1. 1 post = 1 card
We keep everything pertaining to a post in one card only. This includes all documents, images, links, and discussions.
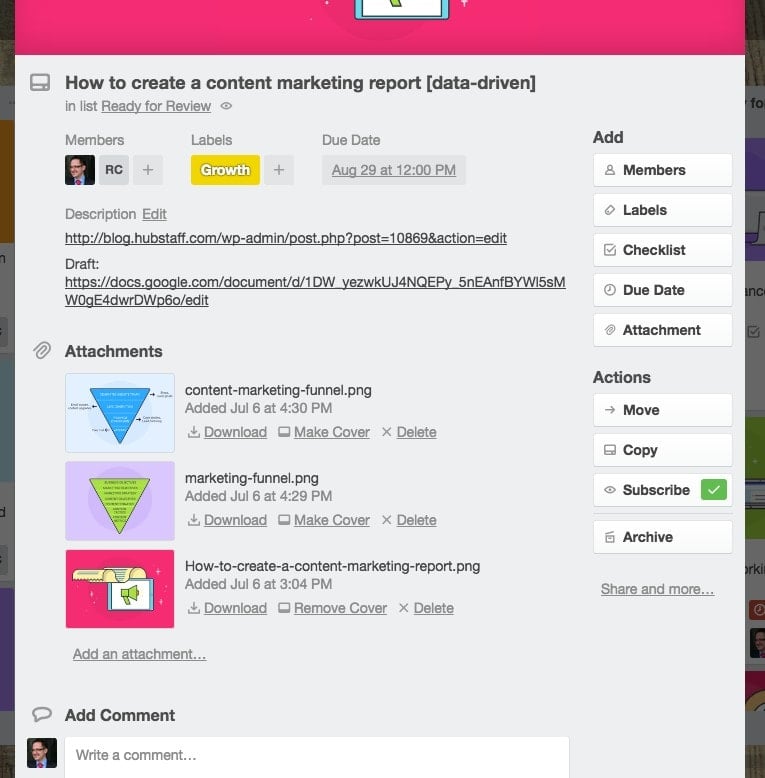
As you can see in the example above, we have links to the post draft on Google Docs and the post itself on WordPress, all the graphics, content upgrades, etc. are also uploaded and all discussions we’ve had about the post follow below.
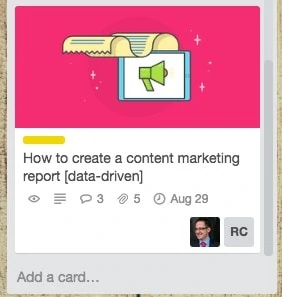
#2. Make the header image a cover for the card
A smart way to quickly find your way around all cards on the board (as you saw above, ours is pretty busy) is to use the header image of the post as a card cover. This creates a visual shortcut which makes it easy to find the post you’re looking for.
Our editorial process: how we are using the editorial calendar
You have the right tools in place and you’re ready to dive in the actual editorial process.
But what’s the next step? It’s making actual use of the system you have set up.
Here are the 10 steps we are following with our editorial calendar to drive successful blog posts.
#1. Ideation
Coming up with powerful content topics is not easy, but there are a few places you can draw inspiration from.
We put customer feedback at the heart of content ideation. We actively seek people’s opinions and we make sure we listen to what they have to say. In this way, we’re able to gather a lot of topic ideas because we know what interests our readers.
Our SEO strategy is another source of content ideas. Besides the typical keyword research, we focus a lot on examining successful content and getting new ideas from it. For example, if we see that a post performs well for a different keyword than the one we targeted, we might create a new article for the other keyword to benefit from the opportunity.
And of course, I do a lot of competitive research to stay abreast of what people are interested in. I check what content does well and see what is trending in communities such as GrowthHackers and Inbound.org. This is an excellent way to check what kind of content holds potential at the moment.
#2. Hand-off to writer
Once you’ve settled on a topic, it’s time to assign it to an appropriate writer.
#3. Research and outline
The first step for the writer is to create an outline of the blog post. Then I provide them with feedback on the outline. This can save you a lot of time because you decide together what the focus of the piece would be. That way, there’s a much lower chance that the writer would need to go back and re-write a significant part of a draft.
#4. Produce the first draft
With the outline approved, the writer goes on to create the first draft of the post. I then review it and give feedback on it too.
#5. Add to WordPress
After we’re settled on the content of the article, the writer uploads it to WordPress along with images and other necessary details.
#6. Create blog post graphics
Then we hand off the post to the blog designer who prepares the header image and any other visual materials for it.
#7. Create content upgrades (optional)
For some blog posts, we have content upgrades, which are like expanded versions of the post that give readers additional information. The Trello board template you can get in this article is an example of such a resource.
If we have such an upgrade, we take care of it after the visuals are ready.
#8. Set up the post in WordPress
When both visuals and any content upgrades are prepared, I go on to set up the post in WordPress.
#9. Schedule and publish
Everything is ready, which means it’s time to schedule the post according to your plan and schedule.
#10. Hand-off to amplification team
When the post goes live, our amplification team takes over. They make sure the article is shared and brings traffic to our blog.
Besides going through the 10 steps, I make sure that I keep track of the whole process regularly. Every Wednesday I review the schedule for the upcoming week and make sure we have everything covered. This helps us avoid gaps.
To get inspiration for new content and check on our ROI, every Monday I look at the stats from the previous week too.
What we can improve in our editorial calendar process at Hubstaff
We’re quite happy with our current editorial process and the editorial calendar system we have created. Still, there are always things that can work better.
One of the tedious elements in our process is that there is no integration between Trello and WordPress. This would save us some time that is now wasted on scheduling and syncing across both platforms.
And within Trello, we can improve the way we use Labels. Currently, we are not following a strict system when applying them. This means we are certainly not using their potential to the fullest.
Over to you
In this guide, I’ve explained all the steps that we follow in setting up our editorial calendar and how we are actually using it. Having such a process in place can boost your content marketing efforts and bring order in your content creation efforts.
What’s your editorial calendar like? What process do you follow to create and distribute stellar content? Let us know in the comments!
Most popular
How to Calculate a Raise: Practical Guide for Employers
By 2030, the US alone will lose $430 billion annually due to low talent retention — and a lot of this turnover stems from low pa...
How to Survive and Thrive in an 80-Hour Work Week
It’s hard to believe that only a century ago, the 80-hour work week was the norm in the United States. Then, in 1926, the Ford M...
Mastering Workforce Scheduling: Techniques and Tools for Success
Imagine a workday where scheduling your workforce effectively ensures that every shift is perfectly aligned with your business nee...
Top Time Trackers for Virtual Assistants: Enhance Efficiency and Accountability
Virtual assistants (VAs) have a lot of responsibilities — and so do the people who hire them. With so much to keep track of, a t...

